 Save
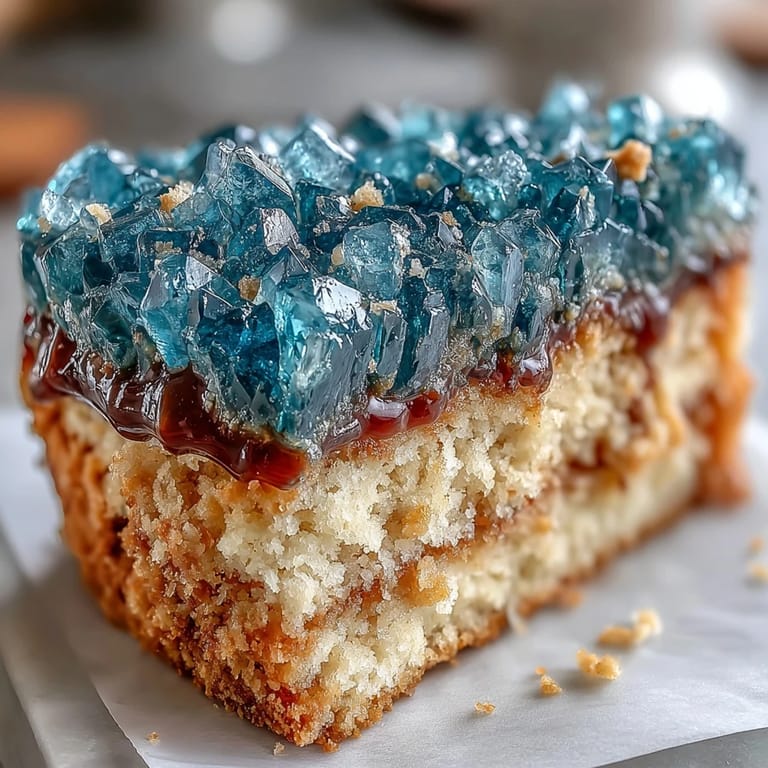
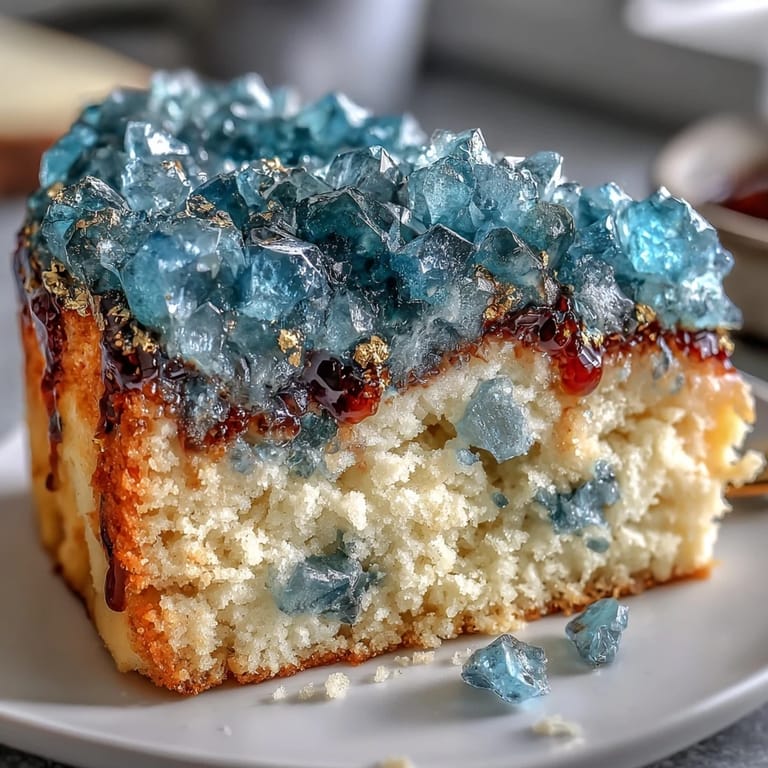
Save The first time I made a geode cake, my kitchen felt like a gemstone workshop, not a bakery. There was a sense of playful anticipation, swirling teal food coloring into clusters of rock sugar as sunlight pooled on the countertop. The air hummed with the vanilla-sweet promise of celebration, and every gold brushstroke sparked a bit of creative courage. As the layers cooled, I caught a whiff of melted butter and powdered sugar, filling the room with the scent of accomplishment. This Graduation Cake, with its shimmering teal and gold slice, quickly became the centerpiece for moments that deserved a little extra sparkle.
One afternoon, prepping for a friend's graduation, I accidentally dropped half the gold leaf on my apron. We both laughed, deciding imperfect sparkle was exactly right for marking big milestones. The cake, proudly sliced and shared, became part of the memory—its jewel-like geode edge caught every eye, and a chorus of compliments filled the room.
Ingredients
- All-purpose flour: Using 3 cups ensures the cake has enough structure to support bold decorations. For even mixing, sift the flour before adding.
- Baking powder: This helps the layers rise, keeping them light even under all that buttercream and sugar.
- Salt: A small pinch brings out the vanilla flavor, so don’t skip it.
- Unsalted butter: Room temperature butter creams smoothly, giving your cake and frosting the best texture.
- Granulated sugar: Two cups create a tender crumb and just the right sweetness for celebratory cake.
- Eggs: Room temp eggs blend easily and keep your batter fluffy.
- Vanilla extract: One tablespoon infuses both cake and frosting with classic bakery aroma—choose real extract for best results.
- Whole milk: Alternating milk and dry ingredients brings a moist, delicate crumb—measure exactly for consistency.
- Powdered sugar: Sift before measuring; this keeps your buttercream lump-free.
- Teal gel food coloring: Gel gives bold color without watering down your frosting or sugar crystals.
- Rock sugar crystals: Clear or white crystals let you dye them any shade you wish—break some bigger chunks for variety in your geode look.
- Edible gold leaf or gold luster dust: Paint brush on gold for metallic drama; just a little goes a long way.
- Simple syrup (optional): Brushing syrup on layers locks in moistness, especially if you want to prep ahead.
Tired of Takeout? 🥡
Get 10 meals you can make faster than delivery arrives. Seriously.
One email. No spam. Unsubscribe anytime.
Instructions
- Bake the cake layers:
- Preheat your oven and line pans, then whisk flour, baking powder, and salt so the dry ingredients are light and airy. Cream the butter and sugar until fluffy—listen for the sound, it's like soft sand—then add eggs one by one, blending till smooth.
- Combine wet and dry:
- Add milk and flour alternately, watching the batter transform into thick ribbons. Divide the mix evenly and bake; when the smell morphs from raw sweetness to warm vanilla, it’s almost ready.
- Cool and prep:
- Let your cakes rest in their pans for ten minutes, then gently tip onto racks. Wait until they're cool to the touch before starting in on frosting.
- Make the buttercream:
- Beat room temp butter until creamy, then slowly add powdered sugar—powdery clouds everywhere! Add vanilla, and just enough cream for a silky, spreadable finish.
- Color your buttercream:
- Stir in teal gel food coloring a little at a time, reserving some plain buttercream for crumb coating.
- Create geode crystals:
- Place clear rock sugar in a bowl, add drops of teal gel coloring, and mix until evenly coated. Spread the crystals on parchment to dry if needed.
- Layer and frost:
- Optionally brush cake layers with simple syrup, then stack with buttercream. Crumb coat with uncolored buttercream for a neat base, chill, then finish frosting with teal buttercream and smooth.
- Carve the geode slice:
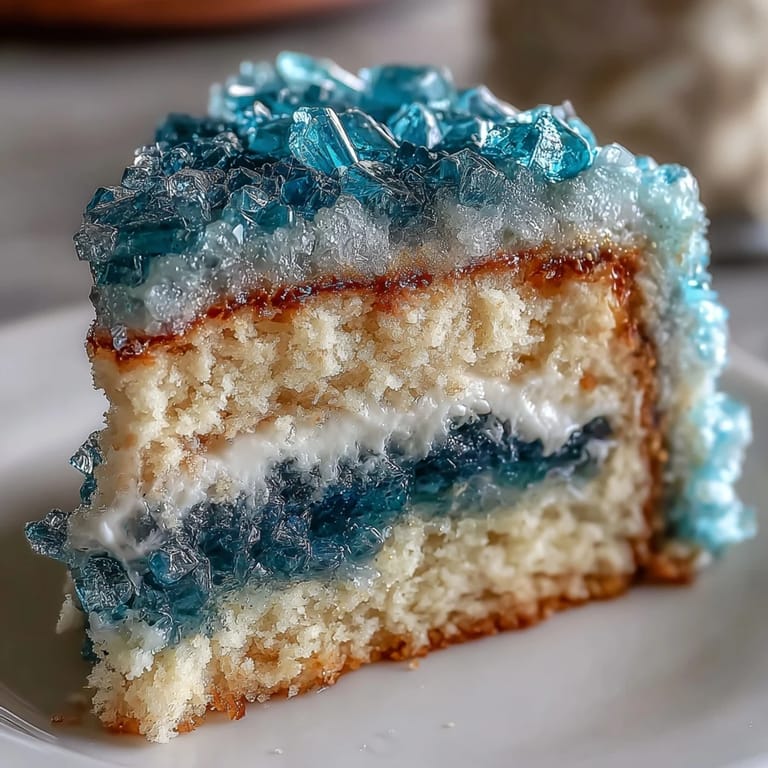
- With a sharp knife, cut a wedge from the side of the cake. Coat the cavity with buttercream, then press colored crystals in, from lighter in the center to darker at the edge.
- Gold accents:
- Brush the geode's edges with edible gold leaf, or mix gold luster dust with alcohol and paint carefully for a metallic edge. Add extra gold touches and a graduation topper if you wish.
 Save
Save On the day of the ceremony, someone snapped a photo right as I pressed the last gold-edged sugar crystal onto the slice. That image stayed with me—the cake was more than dessert, it was a badge of accomplishment and artistry. It’s amazing how even a kitchen mishap can turn into something worth remembering.
Making the Geode Stand Out
The magic comes from layering shades—placing lighter crystals at the center and gradually deepening the color toward the edge. Every time, I see guests tracing the geode with their fingertips, curious about its texture and sparkle. Edible gold adds instant luxury, but a steady hand makes the difference between neat lines and gold everywhere. If you want those crystals to really shine, arrange them under direct light before serving. The cake moves from centerpiece to conversation starter instantly.
Getting the Texture Right
Room temperature ingredients are non-negotiable: too cold, and the cake turns dense, too warm, and buttercream separates. Sifting flour and powdered sugar is worth the extra minute—it keeps every forkful light. When stacking the cake, press layers gently, or you’ll have buttercream oozing out unexpectedly. I always check the sides for gaps and patch with a tiny spatula. It’s easier to fix as you go than to try and cover mistakes later.
Stress-Free Decorating for Big Events
Start the day before, so you’re not decorating at the last minute and can actually enjoy the celebration. I keep parchment and extra buttercream handy for mishaps: a little patching goes a long way. If applying gold, use a dedicated food-safe brush, and keep it damp for more precise lines.
- Don’t skip chilling between steps—firm cake is easier to carve cleanly.
- Cover your workspace with parchment for quick cleanup.
- Save the last gold accents for after arranging the crystals, so you don’t smudge the shimmer.
 Save
Save This teal and gold graduation cake transforms any achievement into a celebration worth remembering. Whether your slice is perfect or patchy, it’s the sparkle and shared joy that shine the brightest.
Recipe Q&A Section
- → How do I create the geode effect?
Carve a wedge into the cake, press teal sugar crystals inside, and accent edges with edible gold for a realistic geode appearance.
- → Can I use other colors for the sugar crystals?
Yes, blend teal and blue food coloring or experiment with other shades to personalize the geode look for your celebration.
- → What is the best way to frost the cake?
Apply a crumb coat, chill, then frost with tinted teal buttercream. Use an offset spatula to achieve a smooth finish.
- → Is this cake suitable for vegetarians?
Yes, all main ingredients are vegetarian-friendly. Review labels on sugar crystals and food coloring for possible allergens.
- → How can I enhance the flavor?
Add lemon or almond extract to the cake batter as desired. These variations complement the vanilla and buttercream base.
- → What tools are needed for assembly?
Prepare electric mixer, mixing bowls, cake pans, offset spatula, parchment paper, serrated knife, and food-safe paintbrush.