 Save
Save My cousin asked me to bake her graduation cake three weeks before the ceremony, and I'll admit I panicked a little. She wanted something that felt like a celebration—something with color and drama that would photograph well for all those milestone photos. I'd never tackled an ombre cake before, but watching her describe her school colors with such pride made me determined to get it right. That's when I realized this cake isn't just about layers and buttercream; it's about marking a moment when someone steps into something bigger than themselves.
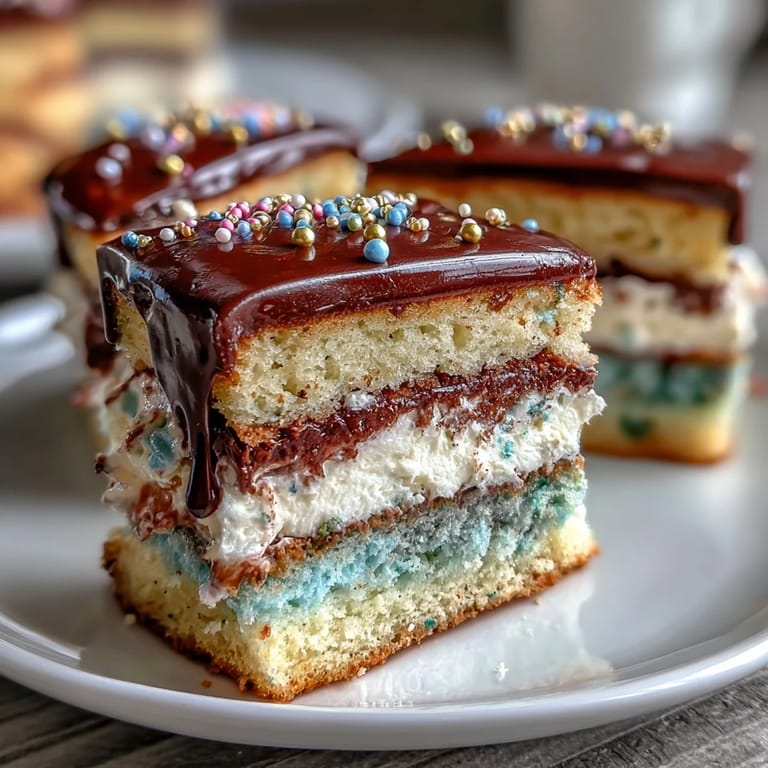
I made this cake on a humid July afternoon, the kind where your kitchen smells like butter and vanilla and summer all at once. My hands were shaking slightly as I stacked those four delicate layers, worried the buttercream might slip, but it didn't. When my cousin walked into the kitchen and saw it sitting there—those four perfect shades graduating from deep to pale—she actually teared up. That's when I understood why people bake these milestone cakes. It's not about perfection; it's about showing up with something you made with your own hands to say, "I believe in this moment as much as you do."
Ingredients
- All-purpose flour: The foundation here—make sure it's fresh and measured correctly or your cake layers might bake up dense instead of tender.
- Baking powder: This gives you the lift you need for four layers that are still light enough to stack without compressing.
- Salt: Just a half teaspoon, but it honestly sharpens the vanilla and prevents the cake from tasting overly sweet.
- Unsalted butter: Use the real stuff, softened to room temperature—margarine won't give you that rich, velvety crumb.
- Granulated sugar: Creaming this with butter until fluffy is non-negotiable; it's what creates tiny air pockets throughout the cake.
- Eggs: Room temperature matters more than you'd think because they blend more smoothly into the butter mixture.
- Vanilla extract: Pure vanilla, not imitation, makes a noticeable difference in the final flavor.
- Whole milk: Also room temperature—cold milk can seize up your batter and create lumps.
- Gel food coloring: This is the secret weapon for ombre cakes; gel colors are more concentrated than liquid, so you get vivid shades without watering down your batter.
- Egg whites: These six whites are destined for Swiss meringue buttercream, which tastes infinitely better than American buttercream once you taste it.
- Butter for buttercream: Again, unsalted and cubed so it incorporates evenly without creating greasy patches.
Tired of Takeout? 🥡
Get 10 meals you can make faster than delivery arrives. Seriously.
One email. No spam. Unsubscribe anytime.
Instructions
- Prep your pans and preheat:
- Heat your oven to 350°F and line four 8-inch round pans with parchment paper cut to fit the bottoms and sides—this prevents sticking and makes turning out the layers so much easier. A little nonstick spray under the parchment keeps it from shifting around.
- Combine your dry ingredients:
- Whisk flour, baking powder, and salt together in a medium bowl, making sure to break up any lumps in the baking powder. This distributes the leavening evenly so every layer rises at the same rate.
- Cream butter and sugar:
- Beat them together for about 3-4 minutes until the mixture is pale, fluffy, and noticeably lighter than when you started. You're literally beating air into it, which creates the tender structure you need.
- Add eggs and vanilla:
- Add eggs one at a time, waiting for each to fully incorporate before adding the next—this prevents the batter from looking curdled or grainy. Mix in vanilla extract until combined.
- Alternate wet and dry:
- Add about a third of the flour mixture, then half the milk, then another third of flour, then the remaining milk, then the last of the flour, mixing on low speed after each addition until just combined. Overmixing here develops too much gluten, which makes cake tough.
- Divide and color your batter:
- Split the batter evenly into four bowls and add increasing amounts of gel coloring to each—start with a tiny drop in one bowl and gradually increase so you get a true gradient from darkest to lightest. Stir gently to distribute color evenly without overworking the batter.
- Bake those layers:
- Pour each color into its prepared pan and smooth the tops with an offset spatula. Bake for 22-25 minutes until a toothpick inserted in the center comes out clean or with just a few crumbs clinging to it.
- Cool properly:
- Let layers sit in their pans for 10 minutes so they set enough to handle, then turn them out onto wire racks to cool completely—trying to frost a warm cake is a recipe for disaster.
- Make the Swiss meringue buttercream:
- Whisk egg whites and sugar in a heatproof bowl set over barely simmering water, stirring constantly until the sugar dissolves and the mixture reaches 160°F on a candy thermometer. This pasteurizes the eggs and ensures food safety.
- Whip it cool:
- Transfer the mixture to a stand mixer and whip on high speed for about 10 minutes until stiff peaks form and the bowl feels cool to the touch. The mixture should look glossy and thick.
- Add butter gradually:
- Add softened butter a few cubes at a time, beating well after each addition so it emulsifies properly. If it looks curdled or grainy, keep beating—sometimes it needs another minute or two to come together beautifully.
- Flavor and color:
- Mix in vanilla extract and divide the buttercream if you want to tint portions for ombre piping details. Save some plain if you want contrast.
- Assemble with care:
- Place the darkest layer on your cake stand or serving plate, spread a generous amount of buttercream on top, and repeat with the remaining layers in order from darkest to lightest. This creates the visual gradient.
- Apply a crumb coat:
- Spread a thin layer of buttercream over the entire cake, which seals in any loose crumbs and makes the final frosting look polished. Chill this for 20 minutes so it sets.
- Final frosting:
- Apply the final layer of buttercream, blending colors gently with an offset spatula if you want an ombre effect on the outside, or use piping bags to create patterns. Take your time here—this is what people see.
- Decorate and chill:
- Add edible pearls, a graduation topper, or piped details while the buttercream is still soft so they stick. Chill the entire cake until set, then bring it to room temperature before serving for the best flavor.
 Save
Save I'll never forget the moment my cousin's guests arrived at the party and everyone immediately surrounded the cake on the dessert table. People were taking photos from every angle, and my cousin was beaming in a way that made all the careful color-mixing and late-night practice worthwhile. Food is memory, yes, but more than that—it's evidence that someone cared enough to spend hours making something beautiful for you.
Why Gel Coloring Changes Everything
The first time I tried this cake, I used liquid food coloring because it was all I had, and the batter separated into a gritty, sad mixture that baked into layers with weird streaks and dense pockets. I learned that liquid coloring contains way more water than gel, and that extra moisture throws off the entire ratio of wet to dry ingredients. Gel coloring is concentrated, so you use less of it, which means your batter stays balanced and your layers bake up even and tender. Now I always keep gel coloring on hand specifically for cakes like this where color matters but texture matters more.
The Temperature Trust
My friend once made this cake with eggs straight from the fridge, thinking it wouldn't matter, and the batter looked curdled and broken from the moment she added them. Room temperature ingredients blend together smoothly because they're closer in temperature, so emulsification happens naturally without shock to the system. It sounds fussy, but pulling your eggs and milk out 30 minutes before you start genuinely prevents lumpy, dense cakes. I now do this automatically whenever I'm creaming butter and sugar—it's become such a habit that I don't even think about it anymore.
Stacking Secrets and Storage
I've learned that a crumb coat isn't just a technique—it's insurance against crumbs showing up in your final frosting, which ruins the whole polished look you're going for. The crumb coat also gives you a chance to level out any uneven cake layers with a thin scrape of buttercream, which is way less dramatic than trimming with a serrated knife. This cake actually improves if you make it a day ahead and refrigerate it overnight; the flavors deepen and the layers become easier to handle because they're firmer.
- Always chill between the crumb coat and final frosting—this prevents the layers from sliding around and makes the final coat smoother.
- Bring the finished cake to room temperature before serving so the buttercream is soft and silky on the tongue instead of dense.
- Store leftovers covered in the refrigerator for up to four days, though honestly this cake rarely lasts that long.
 Save
Save Baking this cake taught me that celebration desserts don't have to be restaurant-level perfect to be meaningful—they just have to be made with intention and care. Your grad deserves something that tastes as beautiful as it looks, and this cake delivers on both counts.
Recipe Q&A Section
- → How do I achieve the ombre effect in the layers?
Divide the batter into separate bowls and gradually add gel food coloring with increasing intensity to each portion before baking.
- → What is Swiss meringue buttercream?
It’s a smooth, silky frosting made by whipping egg whites and sugar over heat, then adding softened butter for a light and creamy texture.
- → Can I prepare the cake in advance?
Yes, cake layers and buttercream can be made ahead and assembled later. Chill the decorated cake and bring to room temperature before serving.
- → What tools are necessary for decorating?
Essential tools include piping bags, decorative tips, an offset spatula, and round cake pans of 8 inches in diameter.
- → How can I enhance the colors of the layers?
Use gel food coloring instead of liquid to intensify the hues without altering batter consistency.