 Save
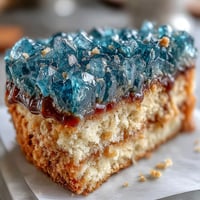
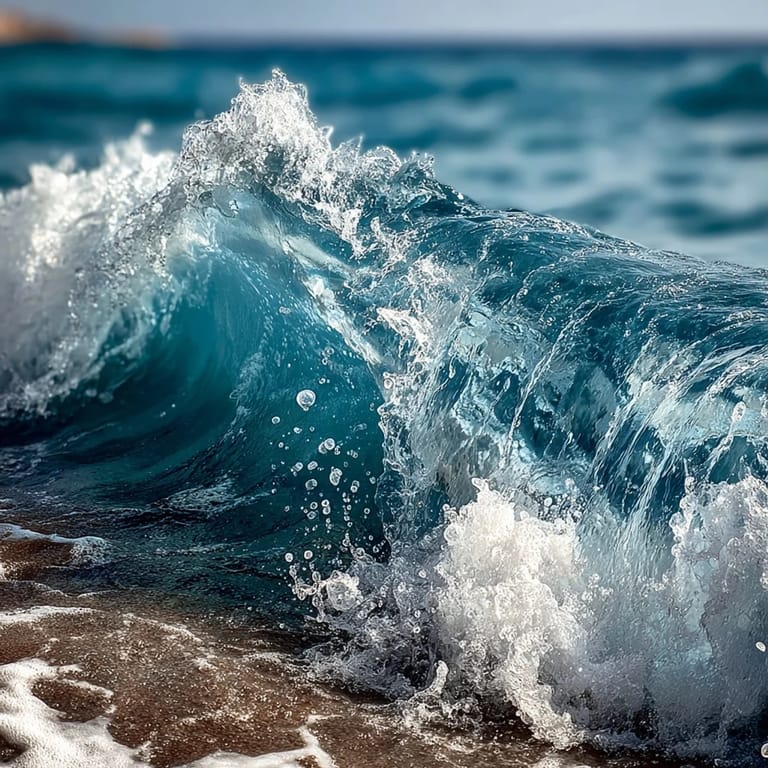
Save My sister turned twenty-three on a cloudy March afternoon, and she casually mentioned loving the ocean and her Pisces sign in the same breath I was asking what cake she wanted. That spark of inspiration hit differently—not the typical chocolate or vanilla request, but a chance to create something that felt like her. I'd never piped waves before, but watching her eyes light up when I brought out that blue ombré masterpiece made every wobbly stroke worth it.
I made this cake twice in one month—once for my sister's birthday and again for a coworker's engagement party. The second time, I was more confident with the wave piping, and my friend whispered that it looked like something from a bakery window. That compliment stuck with me more than I expected, probably because I'd doubted myself the first round.
Ingredients
- All-purpose flour (2 ½ cups): The foundation that needs to be measured correctly, so spoon and level rather than scooping straight from the bag—it makes a real difference in the cake's structure.
- Baking powder (2 ½ tsp): This is your lift, and using fresh powder matters more than people realize; old leavening creates dense, disappointing results.
- Salt (½ tsp): A small amount that amplifies the vanilla flavor in ways you won't consciously notice but will absolutely taste.
- Unsalted butter (1 cup for cake, 1 ½ cups for frosting): Room temperature is non-negotiable here; cold butter won't cream properly and you'll end up with a gritty texture.
- Granulated sugar (1 ¾ cups): Beat this with butter for a full three minutes until it's genuinely light and fluffy, not just mixed together.
- Large eggs (4): Room temperature eggs incorporate smoothly, creating a tender crumb; cold eggs can cause the batter to split and seize.
- Pure vanilla extract (1 tbsp for cake, 2 tsp for frosting): Don't skimp on quality here, as it's one of the few flavors carrying the whole cake.
- Whole milk (1 cup for cake, ¼ cup for frosting): Room temperature milk prevents shocking the batter and keeps everything evenly mixed.
- Powdered sugar (5 cups): Sifting removes lumps and creates a smoother frosting that pipes beautifully without gritty resistance.
- Blue gel food coloring (various shades): Gel coloring is the secret because it doesn't water down the buttercream like liquid coloring does, keeping your frosting the right consistency.
- White gel food coloring: Use this to lighten and create your pale aqua shades without relying solely on water.
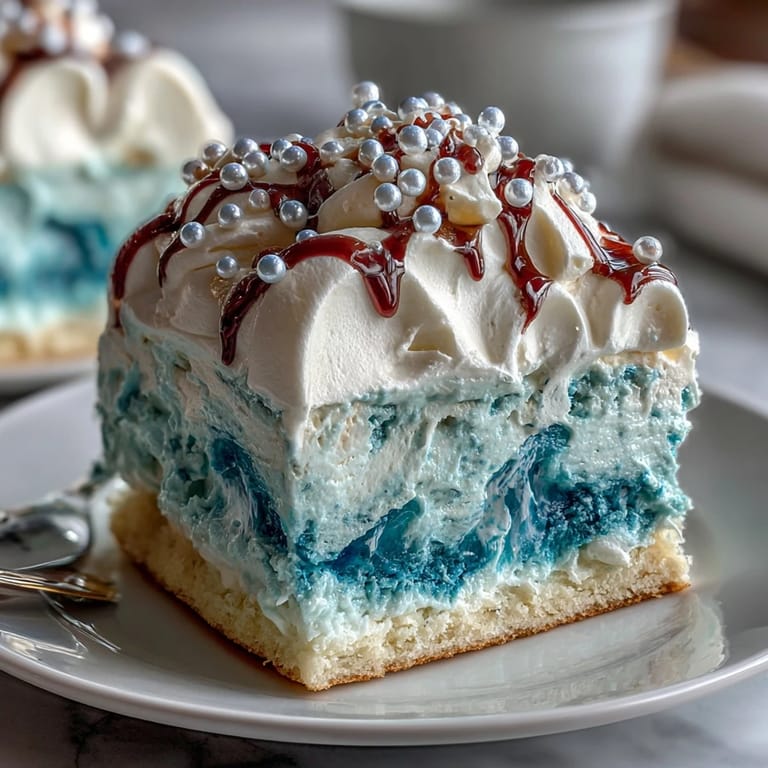
- Edible pearls (optional): These catch light and add an oceanic shimmer that feels luxurious and special.
Tired of Takeout? 🥡
Get 10 meals you can make faster than delivery arrives. Seriously.
One email. No spam. Unsubscribe anytime.
Instructions
- Prepare your stage:
- Preheat the oven to 350°F and set up your 9x13-inch pan with parchment paper, tucking the corners neatly so the cake lifts out cleanly later. Gathering your ingredients and setting them at room temperature now prevents scrambling mid-mix.
- Build the dry mixture:
- Whisk flour, baking powder, and salt together in a medium bowl, breaking up any lumps with the whisk. This distribution of leavening throughout the flour ensures even rise.
- Cream the base:
- Beat room-temperature butter and sugar together for a full three minutes until the mixture looks pale, almost mousse-like, and falls off the beater in ribbons. This aeration is what gives the cake its tender, fine crumb.
- Incorporate the eggs:
- Add eggs one at a time, waiting for each to fully combine before adding the next; this prevents a greasy, separated batter. After all eggs are in, beat in the vanilla extract until it disappears into the mixture.
- Alternate dry and wet:
- Starting with the dry mixture, add it in three additions alternating with milk in two additions, mixing on low speed just until combined after each addition. Overmixing at this stage overdevelops gluten and creates a dense, tough cake.
- Bake with confidence:
- Pour the batter into the prepared pan, smooth the top gently, and bake for 28-32 minutes until a toothpick comes out clean or with just a few crumbs. The kitchen will smell like vanilla and butter, and that's when you know you're on track.
- Cool strategically:
- Let the cake rest in the pan for 10 minutes so it sets slightly, then turn it out onto a wire rack to cool completely at room temperature. Rushing this step or chilling too quickly can cause the cake to crack.
- Make the buttercream base:
- Beat room-temperature butter on medium speed for two minutes until it's creamy and pale, then gradually add sifted powdered sugar while mixing on low to avoid a sugar cloud. Once combined, add vanilla and milk, then beat on medium-high for several minutes until the frosting is fluffy and light.
- Create your color palette:
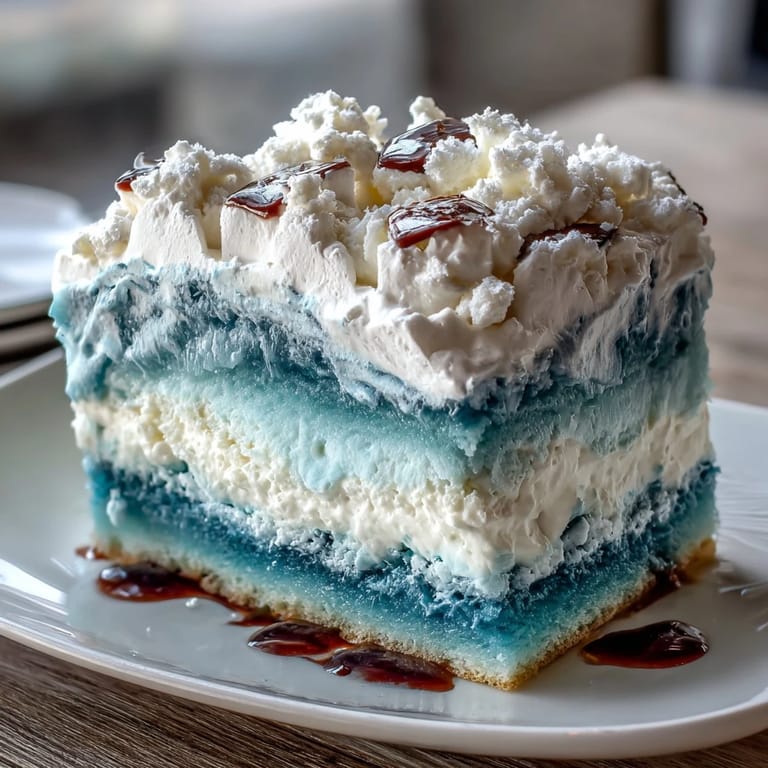
- Divide the buttercream into three or four bowls depending on how many shade gradations you want, starting with the deepest ocean blue in one bowl and progressively lightening with white gel coloring. Keep one portion pure white for sea foam piping.
- Apply the crumb coat:
- Spread a thin, even layer of white buttercream over the entire cooled cake to trap any loose crumbs, then refrigerate for twenty minutes so this base layer sets. This step is invisible but essential for a professional-looking final cake.
- Build the wave effect:
- Using an offset spatula, apply the darkest blue buttercream at the base of the cake in swooping, curved motions that mimic ocean waves, then layer progressively lighter shades moving upward. Think of each wave as flowing and connected rather than separate strokes.
- Crown with sea foam:
- Pipe white buttercream on top using a round or petal tip, creating organic, foamy shapes that look like waves cresting. The contrast between the blue waves and white foam is what makes this cake visually stunning.
- Finish with details:
- If desired, scatter edible pearls across the cake for shimmer, and add a fondant or white chocolate Pisces symbol as a personal touch. Step back and admire before chilling for transport.
 Save
Save When I set that cake on my sister's table and she gasped, I realized it wasn't really about the decoration—it was about showing someone you paid attention to what makes them feel seen. A cake shaped like her favorite ocean, baked with her favorite flavors, felt like a edible apology to my usual generic birthday efforts.
Why Gel Coloring Changed Everything
I made the mistake of using liquid food coloring on my first attempt, and the buttercream became thin and slippery, requiring an extra cup of powdered sugar to reach the right consistency. That extra sugar made the frosting cloyingly sweet, and the waves wouldn't hold their shape. Switching to gel coloring for round two was a revelation—the same vibrant blues without sacrificing texture or taste, and the frosting piped like a dream.
The Sheet Cake Advantage
There's something liberating about a sheet cake that you don't have to stack, level, or fill. You bake it once, frost it once, decorate it once, and you're done. This format is actually more forgiving than a layer cake because there's less structural engineering required, and honestly, it serves more people with less fuss.
Flavor Variations and Storage
The vanilla sponge is a blank canvas, which means you can add lemon zest to the batter for brightness or a hint of almond extract for depth. Baked and frosted, this cake keeps beautifully in the refrigerator for three days, staying moist under plastic wrap and tasting better the next day once the flavors settle.
- Add one tablespoon of lemon zest to the batter for a subtle citrus note that plays nicely with vanilla without overwhelming it.
- Make extra frosting and freeze it in ice cube trays so you can pipe additional cakes later without starting from scratch.
- Transport the cake on a flat, stable surface and keep it cool until an hour before serving for the best appearance and texture.
 Save
Save This cake taught me that presentation doesn't have to be complicated to feel meaningful, and that baking for someone with intention changes how it tastes. Make this for someone who loves the ocean, loves their sign, or just loves cake—they'll taste the care in every bite.
Recipe Q&A Section
- → What type of flour works best for the sponge?
All-purpose flour provides the ideal balance for a moist and tender vanilla sponge in this cake.
- → How do you achieve the blue ombré effect on the buttercream?
Divide the buttercream into several portions and tint each with varying shades of blue gel food coloring, then layer from dark to light.
- → Can I prepare the cake ahead of time?
Yes, baking and cooling the cake the day before allows time for decorating and chilling for cleaner piping.
- → What tools are necessary for creating the wave piping?
An offset spatula for spreading and piping bags with round or petal tips help form the swooping ocean waves.
- → Are there optional decorations for enhancing the aquatic theme?
Edible pearls and white chocolate or fondant Pisces symbols add extra detail and elegance to the cake appearance.